Bas-relief a type of relief (sculpture) -in which there is only a slight projection from the surface is and no part of the modeled form is undercut. It is primarily 2 dimensions.
Definition of repoussé shaped or ornamented with patterns in relief made by hammering or pressing on the reverse side —used especially of metal. Repoussé is a form of bas relief sculpture that dates back to antiquity.
👉 Project Objectives: To create a sculpture in relief is to give the impression that the sculpted material has been raised above the background plane.
- Use Foreground, Middle Ground and Background levels.
- Utilize a balance of shapes and textures in your composition
- Demonstrate a variety of techniques
Art Historical References
The Greeks in the 3rd century B.C. made armor breast plates from bronze using the repoussé technique

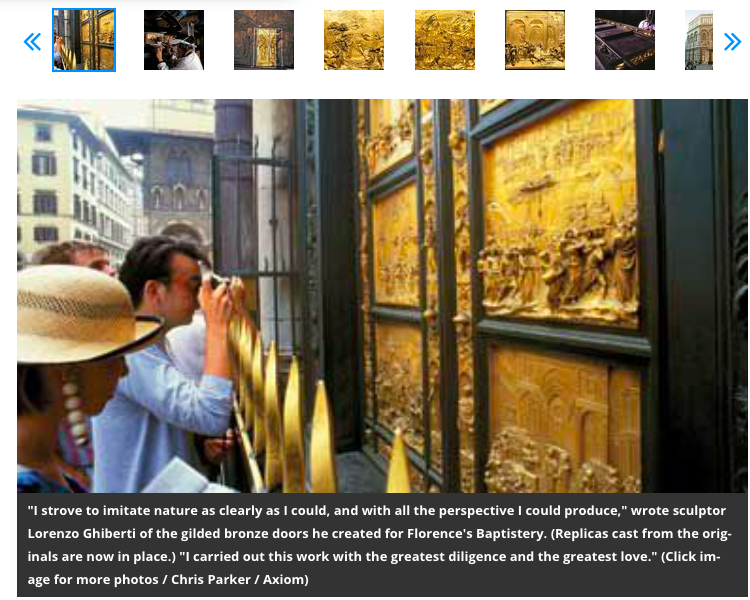
Gates of Paradise
See the article and more photos here
Panels from the Italian Renaissance sculptor Lorenzo Ghiberti tour the U.S. for the first time
By Arthur LubowSMITHSONIAN MAGAZINE |
NOVEMBER 2007
More Vocabulary
- Foreground: the part of a view that is nearest to the observer, especially in a picture or photograph. the part of a composition that appears closest to the viewer.
- Middle ground: the part of a composition between the foreground and background.
- Background: the part of a composition that appears to be farthest from the viewer.
👉 Process
- Create your design on paper. With clear outlines
- Tape your drawing over the copper sheet.
- Place the copper sheet on newspaper, a piece of thin Styrofoam or another soft surface underneath the copper.
- Draw the design over with the ballpoint pen to transfer the design to the copper. Once the basics have been traced, remove the drawing from the foil and use it for reference.
- Decide which shapes/parts will be convex (raised) and what shapes/parts will be concave (pressed in).
- Work to press out the metal creating a design.
- Alternate the side you work on so you get the most contrast. Work slowly and carefully going over the concave areas a number of times with gentle pressure to stretch the metal. Check your work on the reverse side. Turn the foil over and reinforce convex areas in the same manner.
- Details: Add texture by creating patterns, lines, dots, circles, etc.
- When the design is complete you can choose to color the right side of the copper with a marker. Black sharpie markers will create an interesting patina.
- You could also choose to use steel wool or a scrubby sponge to buff out and create highlights on the high points.
👉 Subject Matter/Design
There are many options that you can use for your subject matter or the design of your relief. If this is your first time doing a relief I suggest choosing one of the design-based suggestions below.
Design Based Resources
- Organic and Geometric
- Design Examples
Subject Matter Options:
- Trees or Leaves-Focusing on line, texture and composition.
- Architecture Examples: Great resource with small 6th grade examples
More Difficult: Choose an art historical work (or a section of an art historical) work that shows foreground, middle ground and a background.
- Draw your image or print out a coloring book outline: Here are some options
- Sample Google Search phrases: renaissance art coloring page
- Google Arts and Culture Coloring book experiment (Simply screenshot the linear design)
- Van Gogh's Bedroom
- Van Gogh Auvers Church