Whether you’re brand new or looking to level up your skills, I’ll guide you through laser print transfers and share practical tips to help your prints really shine. I also host free virtual workshops from time to time. Sign up for the newsletter below to get workshop invites, art tips, and studio updates straight to your inbox.
Step-by-Step Guide to Laser Print Transfers
If you’ve tried laser print image transfers and they haven’t worked the way you expected, you’re not alone. While they often look effortless online, image transfers are actually a technical art skill that takes time, experimentation, and practice to truly understand. Struggling or “failing” is not a setback. It’s part of the learning process.
Below you’ll find some of my curated free resources, in both video and text, to help you build confidence and improve your results. If you’d like more in-depth guidance or personal instruction, I also offer self-paced online courses. Registration opens only a few times a year, so be sure to sign up for my newsletter to be the first to know when enrollment opens. Check out my Testimonial Page
Get 25% off when you order my book (or anything else!) from my publisher, Rocky Nook.
Just use code BLUELAVA25 at checkout. Otherwise, it is available wherever books are sold! :) Like Amazon.
I would be ever so grateful if you could leave a book review too! :)
Materials Needed
Most of my recommended supplies can be found on my Amazon Storefront. Here's what you'll need to get started:
- Gel Plate: I recommend Gelli Arts® plates for their quality and durability.
- Acrylic Paints: Amsterdam paints work wonderfully for their rich pigments and smooth application.
- Laser-Printed Images: High-resolution images with ample toner transfer best.
- Brayer: Essential for spreading paint evenly.
- Paper: Standard 80–160gram printer paper for your laser prints.
- Substrates: For your monotypes, heavier papers, like Bristol, can be beneficial for layering. Experiment with different papers or surfaces to find what works for you.
1. Prepare Your Laser Print
- Choose high-resolution images for better toner density.
- Increase contrast during editing to make details stand out. Make sure you are not useing the Eco mode. Try transparency mode or any other setting that will allow for more toner to be laid down on the printout.
- Print in CMYK mode and, if possible, use halftone settings for more toner coverage. (Details below)
- Double-print the image for if your printer is having trouble laying down enough toner to make this work.
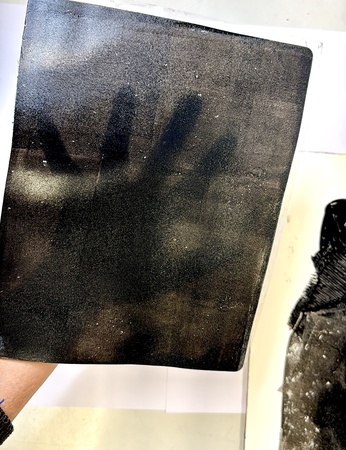
2. Apply Paint to the Gel Plate
- Spread a thin, even layer of acrylic paint onto the gel plate with a brayer.
- Avoid overloading the plate with paint, as this can hinder the transfer process.
- See how you can see my hand, barely, through the gel plate. This is the perfect amount.
3. Transfer the Image
- Place the laser print face-down onto the gel plate.
- Apply light, even pressure with your hands or using a brayer.
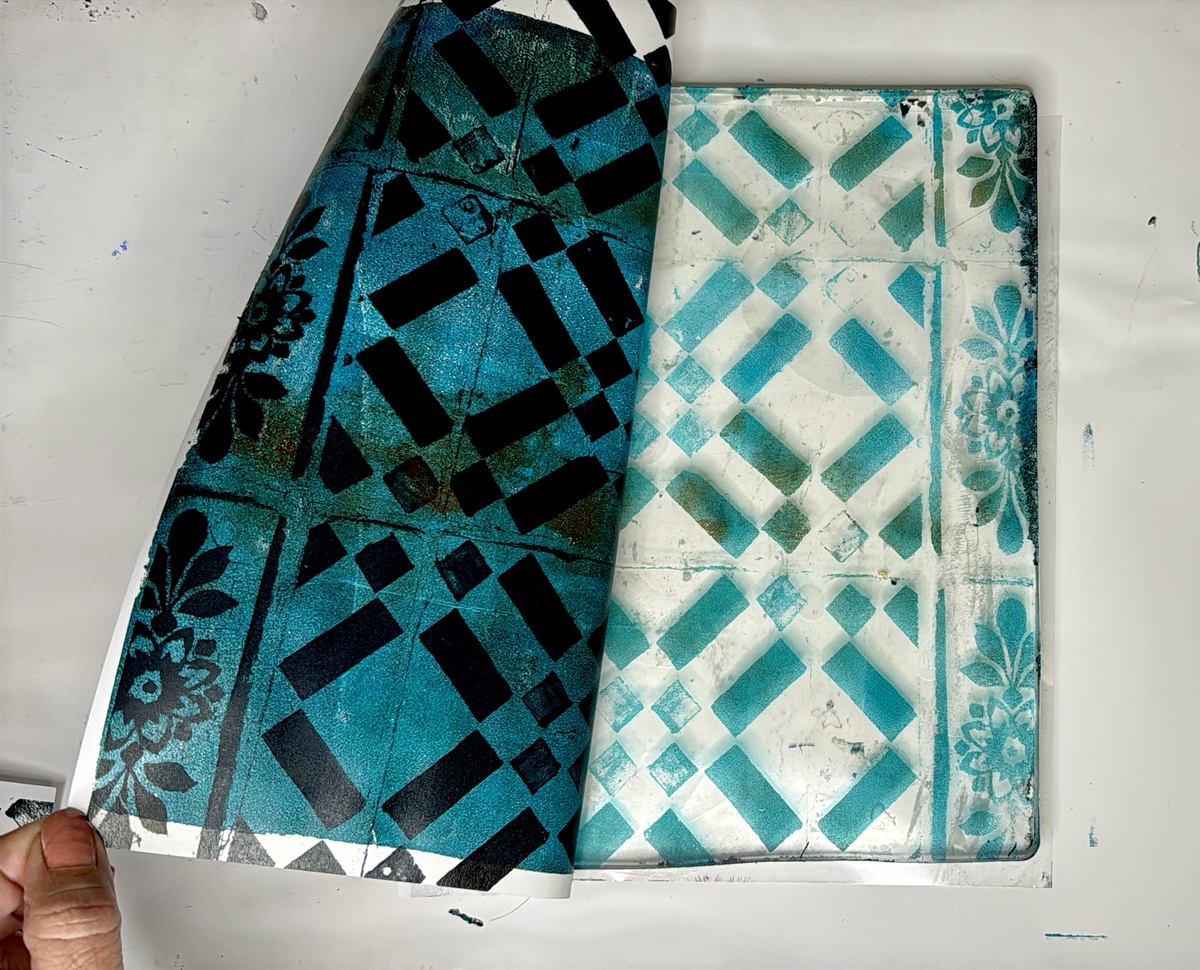
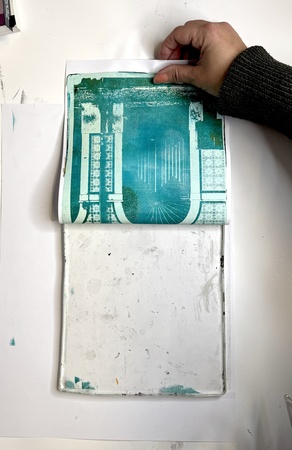
4. Reveal
Gently peel the photo off the gel plate. The toner will repel the paint, leaving the transferred image on the plate.

Reverse Painting: You don’t have to add only one layer before picking it up off the plate, but you can do reverse painting. I have more detailed demonstrations and videos down below
5. Pick Up Layer
- Once the transferred layer dries, cover the entire plate with a new, thin layer of acrylic paint or gel medium.
- Press a sheet of paper firmly onto the wet surface and let it dry completely.
- Peel off the paper to reveal your finished print.
- Of course you don’t have to die right in with a pick up player you can do as many layers of reverse painting as you like. I have some videos down below that go through the process and more detail.
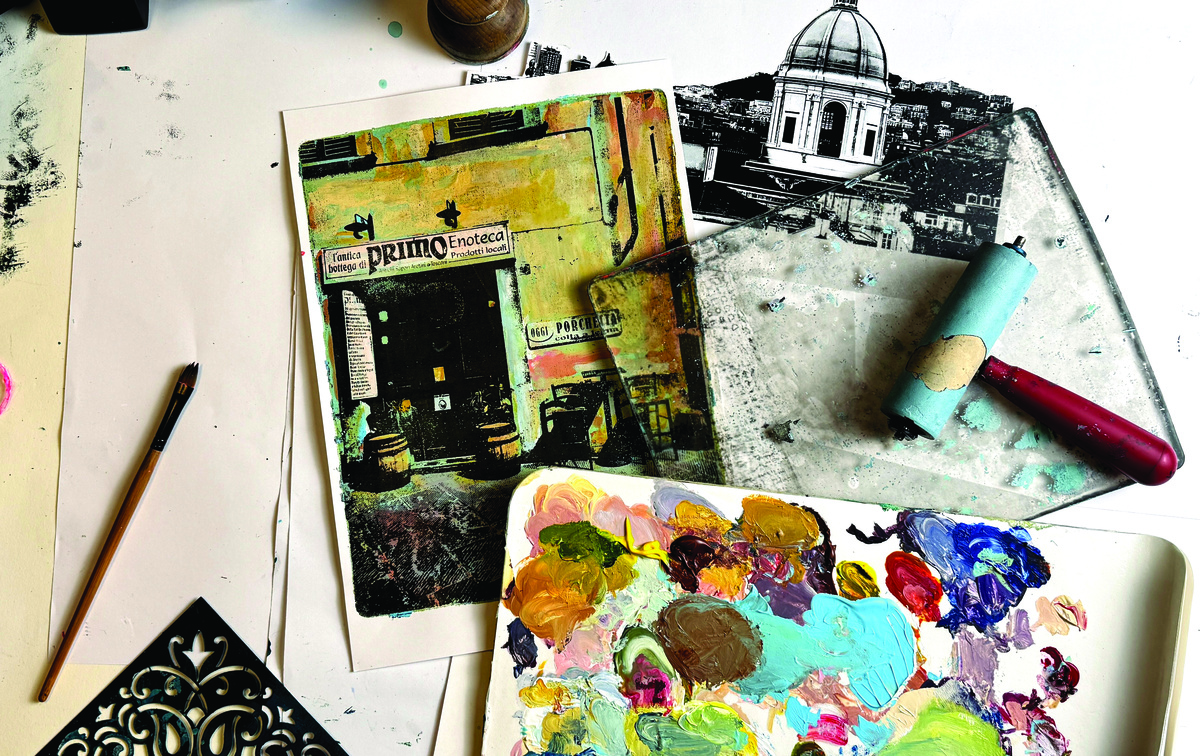
Three Biggest Tips for Gel Printmaking
1. Supplies, Weather, and Timing Go Hand in Hand
Use high-quality tools like Gelli Arts® gel plates and Amsterdam Standard Series® acrylic paints. (They don't pay me to put that here. I do work with the brands, but only after I found that they work really well and are consistently performing!)
Experiment with different paper types, including Bristol and kraft papers.
Pay attention to humidity and drying times, as they can impact your results.
2. Master Layering and Color Mixing
Build depth in your prints by layering thin, translucent layers of paint.
Experiment with color blending directly on the plate to create unique effects. (Reverse Painting)
Allow each layer to dry fully before adding the next for sharper, more defined layers.
3. Embrace Imperfection and Experimentation
Some of the best prints come from unexpected effects.
Try different tools, textures, and techniques to discover new possibilities.
Keep a record of your process to replicate or refine successful methods.
“Mistakes are the portals of discovery.”
James Joyce
Building on the Basics
Editing Your Photos and Printers
I strongly believe that editing your photos properly will give you better results for your image transfers, more than what particular printer you are using. Of course, the printers matter, but I think a bigger component in all of this is creating high resolution photos that are high contrast to begin with. then, if you would like to concentrate your toner more from your printer, print it out with the color settings and use half tone to further concentrate the toner into the little dots re-blow for more.
High Resolution, High Contrast CMYK and Halftone
What is CMYK?
CMYK stands for Cyan, Magenta, Yellow, and Black, the four ink colors used in most professional printing processes. These colors work together to create a full spectrum of hues by layering and blending.
Unlike RGB (Red, Green, Blue), which is used for screens and digital displays, CMYK is designed for printing. Each color is applied in tiny dots that overlap, creating precise and vibrant images on paper.
• Why CMYK Matters for Gel Plate Transfers:
Printing your images in CMYK increases the amount of toner on the paper. This additional toner helps the image transfer more effectively onto the gel plate, especially in black-and-white prints where you can still use CMYK to boost contrast.
What is Halftone
Halftone is a printing technique that simulates gradients and shades by breaking images into small dots of varying sizes.
Instead of using continuous tones, halftone printing uses dots arranged in patterns to create the illusion of smooth transitions in light and shadow. The size, density, and spacing of these dots determine the perceived brightness or darkness of an area.
• Why Halftone Matters for Gel Plate Transfers:
Halftoning can increase the amount of toner applied during printing, making it more likely for fine details to transfer onto the gel plate. Additionally, the dot patterns can add texture and depth to your prints, enhancing the overall quality of your transfers.
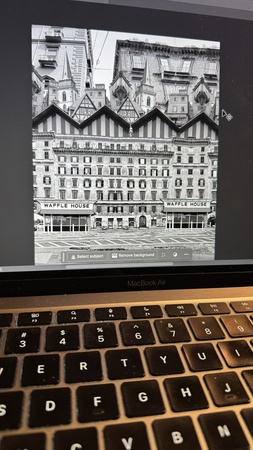
Editing is Key
I use Photoshop, but you could also use other apps even just the photo editing app on your phone to make sure that the resolution is good and that it is high contrast.
Understanding these techniques will help you achieve more vibrant and detailed prints in your gel plate projects
Troubleshooting Common Issues
Printers

I really don’t know much about different types of printers. But others in my comments and my students have recommended these reasonable options below.
Brother HL-L3295CDW, Canon Image Class MF424dw, HP M402n, Brother HL-L2340DW, Canon 6030, Brother HL-L2379DW monochrome , Brother DCP-1612W, HP LaserJet MFP M227fdw
I use a combo copier printer called Triumph Adler when printing with my students at school. I go to my local library and use their printer for most of my prints as well. It can print A4 and A3, and I can adjust the settings. Neither of these printers/copiers is particularly great for art prints. They are more workhorse of a printers/copiers.
Color or Black and White? I prefer color because it lays down more toner but cost may be an option. Black and white can work well but may require you to double print or adjust your settings to deposit more toner per print.If you have a printer you love and want to recommend it or you have had a bad experience with one of these printers. Let me know. I am always looking to update my list to share the most accurate and helpful information.
Printer Paper: I tend to use 90-160 GSM paper like this
With that said, I do believe editing your photos for better printouts will give you much more control over your gel plate image transfers than upgrading your laser printer. Don't have a laser printer, go to a print shop or your local library! It is a much more reasonable option.
Gel Plate Image Transfers with Magazines
Ready to Take Your Skills to the Next Level?
If you’re eager to learn even more about gel plate printmaking, sign up for the waitlist for my Gel Plate Printmaking Course!
This in-depth course will cover advanced techniques, layering strategies, and troubleshooting tips to help you master gel printmaking.
Don’t miss out—this course is designed to take your prints from good to gallery-worthy!
Advanced Techniques
Final Thoughts
Gel plate printmaking offers endless opportunities for creativity. With quality supplies, thoughtful layering, and a spirit of experimentation, you can achieve extraordinary results. For inspiration, tutorials, and more, follow me on TikTok, Instagram and YouTube.
Happy printing!